








I have spent way too many mornings staring at a flat bob in the mirror and wondering why it looked amazing leaving the salon and sad by lunch. After 40, my fine hair just got finer, and I finally learned the difference between cut volume and styled volume. One washes out, the other doesn’t.
So these are the short bobs for fine hair that actually fooled me in a good way. Some lift comes from scissors, some comes from your dryer, and I’ll tell you straight how long each one lasts.

Where Your Bob Volume Really Comes From
- 1. Blunt Cut Line That Sits Right on the Jaw
- 2. Stacked Layers That Lift From the Nape
- 3. Invisible Layers Cut Up Into the Crown
- 4. Forward Perimeter That Kicks Off the Chin
- 5. Deep Side Part Carved Into the Root
- 6. Curtain Fringe That Drops From the Top
- 7. Hidden Undercut Pocket at the Nape
- 8. Blow-Dry Lift That Comes Only From Drying
- 9. Blunt-Stack Hybrid Built to Last All Day
1. Blunt Cut Line That Sits Right on the Jaw
This is where I always tell friends over 40 to start. No layers, no tricks, just one clean line. And honestly? It’s magic for fine hair because you keep every single strand at the same length.
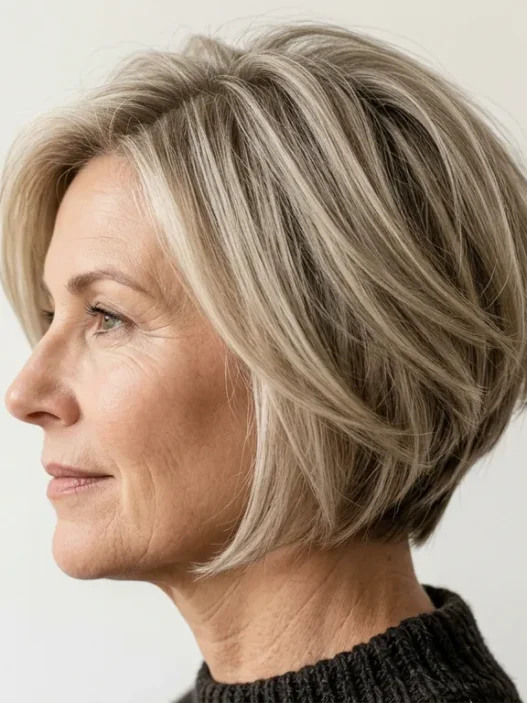
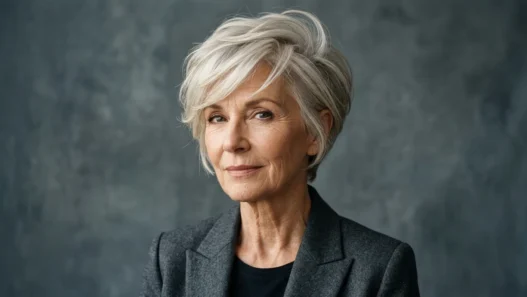
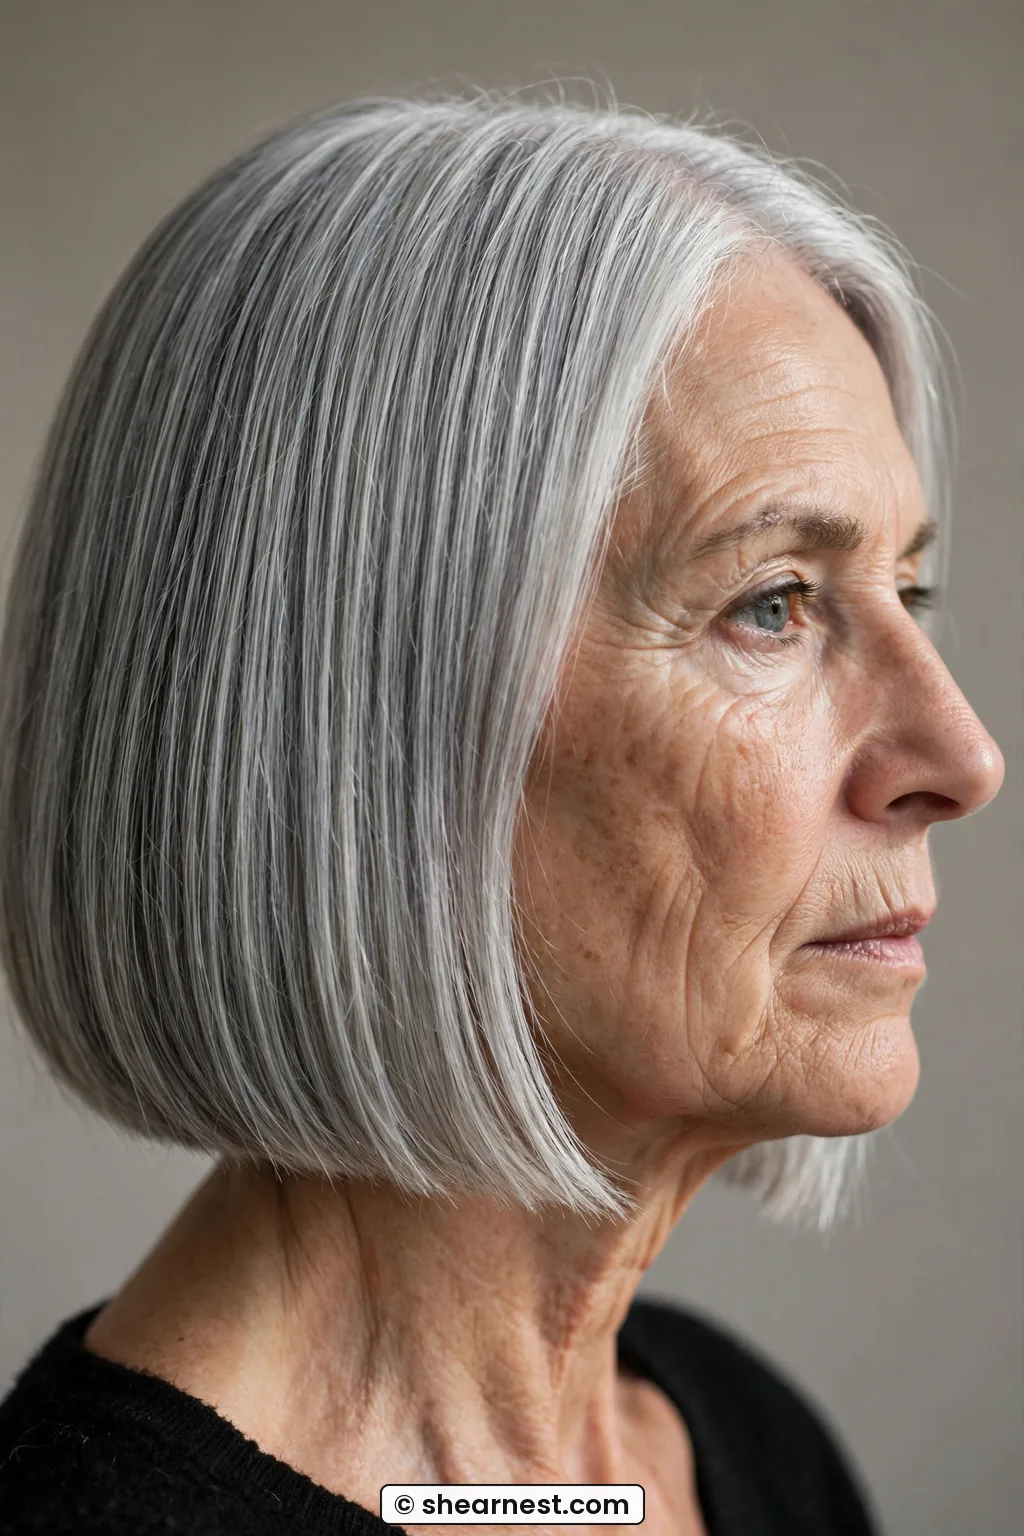
Look at how she’s wearing hers — that angle is exactly what I mean about jawline framing. This is the length I’m talking about. See how it hits just below her chin? It creates a little shelf so the ends look twice as thick as they are. My hairdresser calls it a weight line, I just call it cheating.
When I tried this last spring, I asked for chin-length, blunt, no texture on the ends at all. She cut it dry so she could see exactly where it kicked. The volume here comes from the perimeter, not the top, so don’t expect big crown lift. What you get is density at the bottom that lasts until your next cut.
How long does it last? Six to eight weeks, easy. Then the line softens and you lose the illusion. I go back for a 10-minute perimeter trim in between full cuts. Totally worth it. If you read up on the best haircuts for fine hair you’ll see blunt bobs at the top every time, and there’s a reason for that.
2. Stacked Layers That Lift From the Nape
Ah, the stacked bob. I avoided it for years because I thought it was too soccer-mom 2008. I was wrong.
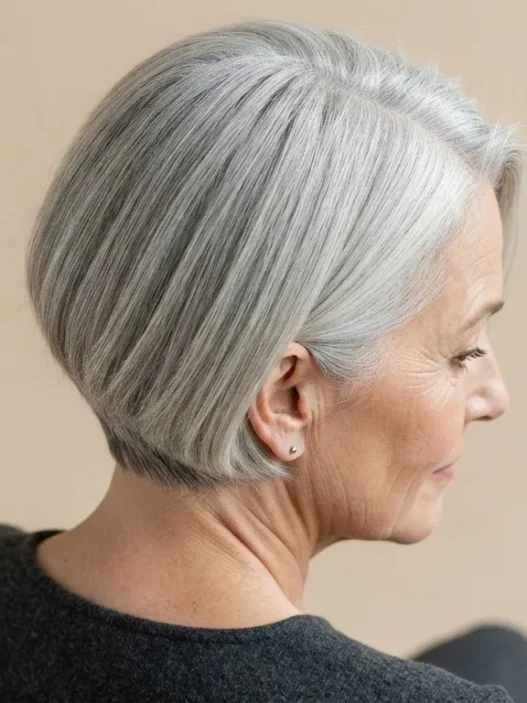
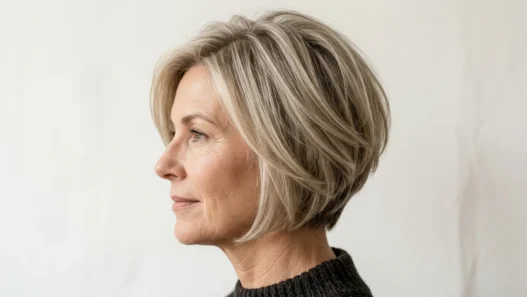
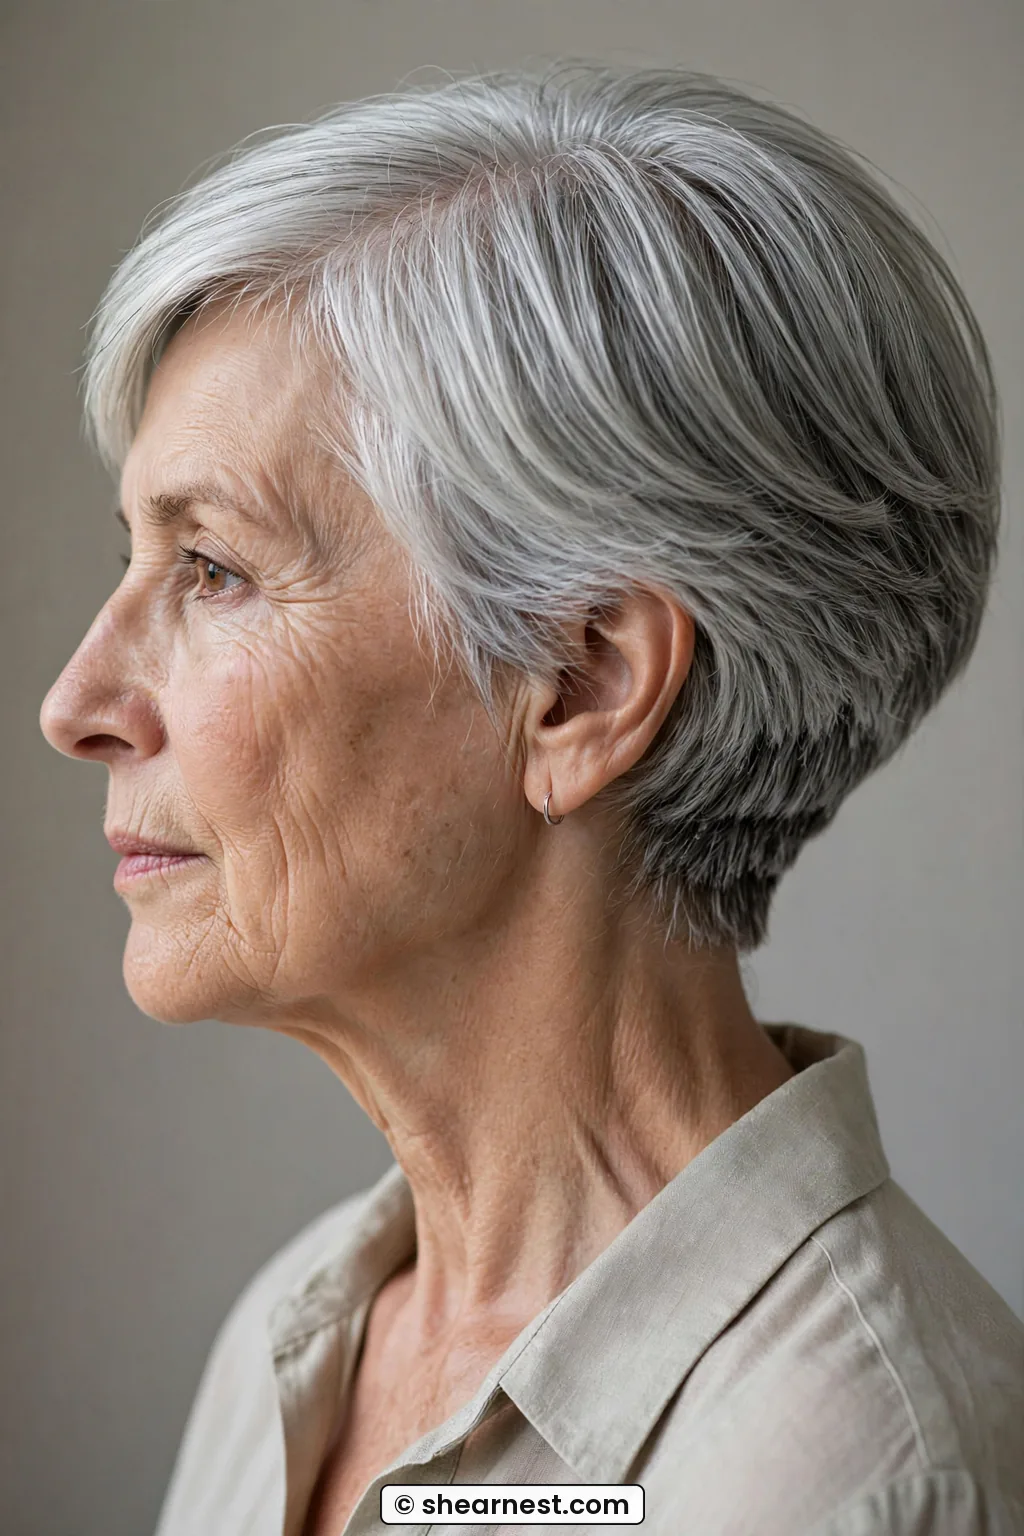
The lift here comes from underneath, from short layers stacked at the back of the head. They push the top layers up like a little shelf. She’s got a similar neck length to mine, and honestly, this cut looks incredible on her from the side — you can see that graduation rising from the nape to the occipital bone. That’s what gives you that rounded, full silhouette even when your hair is baby-fine.
My favorite way to wear it is slightly longer in front, shorter in back. Not a dramatic inverted bob, just a half-inch difference. Ask your stylist to keep the stacking tight and not to thin it out — thinners are the enemy here. You want weight stacked on weight. I learned about keeping density through stacking when I was reading up on haircuts for thin hair over 50 and it finally clicked.
Lasts about five weeks before the nape starts to grow out and lie flat. You’ll feel it first when your collars start flipping it out. A quick nape clean-up fixes it.
3. Invisible Layers Cut Up Into the Crown
These are not your 90s layers. You can’t see them, and that’s the point.
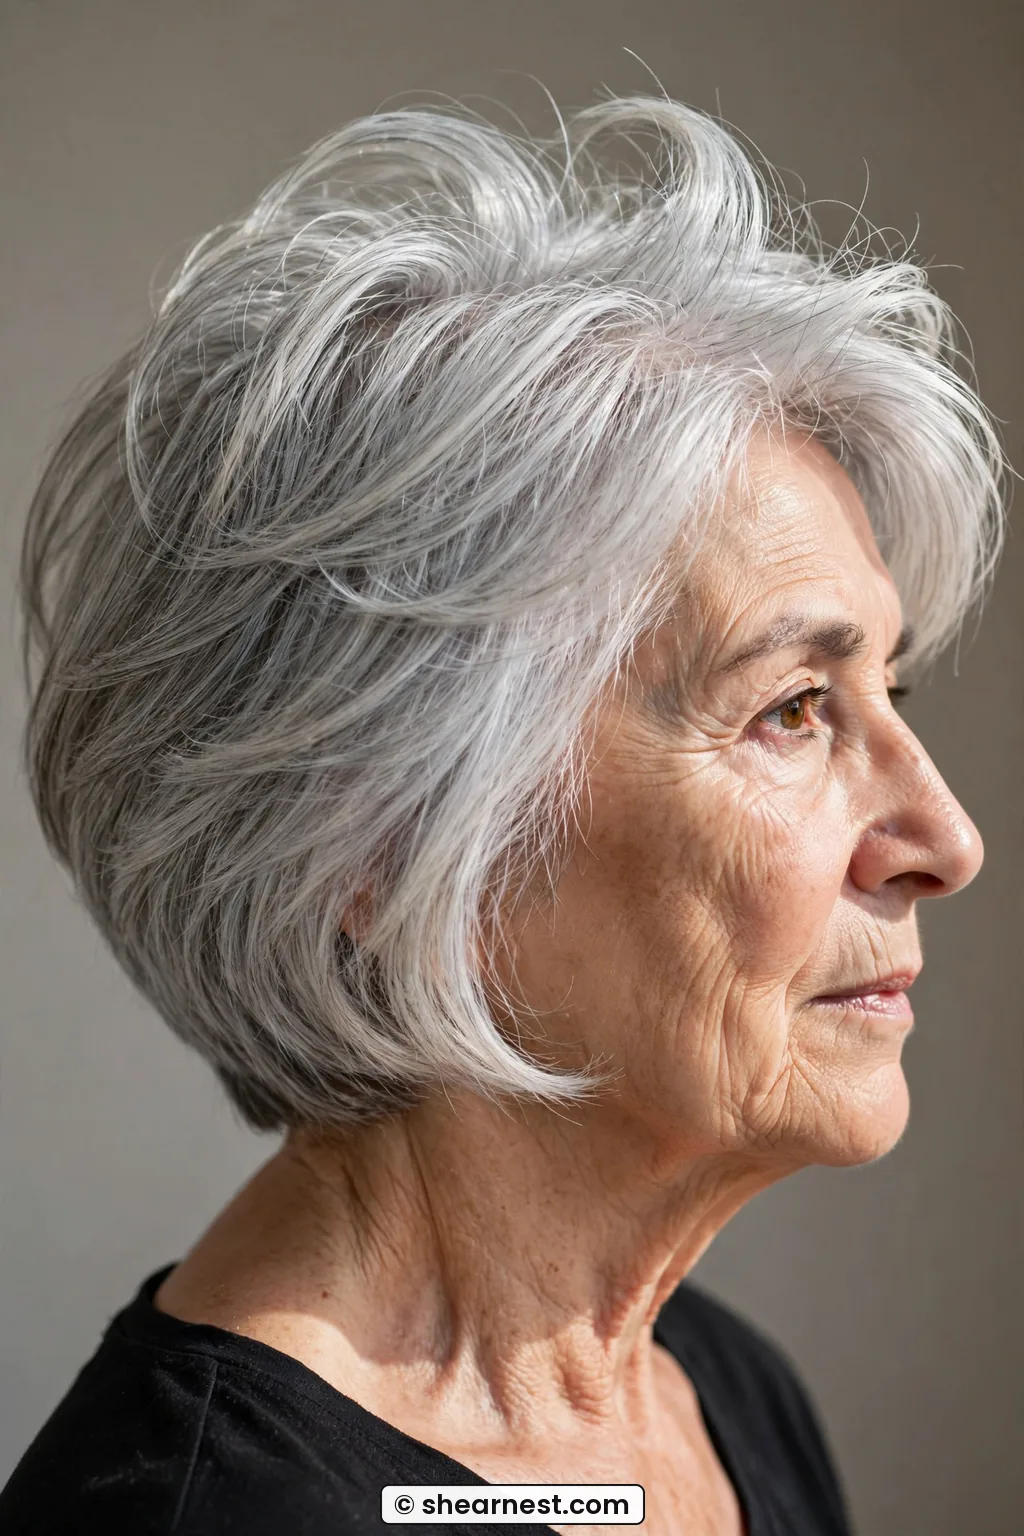
My stylist does two or three super-short layers hidden under the top section, right at the crown. They act like little springs. The top hair sits on them instead of plastering to my scalp. From the outside my bob still looks blunt, but it has air in it. Have you ever had a cut that looked the same but behaved totally differently? That’s this.
The volume comes from inside the cut, up at the crown. It lasts through washes, which I love, but be honest with yourself — if your hair is very silky and straight, those little layers can slip out after a few weeks. Mine holds for about a month. I refresh with a dusting, not a full cut. You can also read up on volume techniques for fine bobs before your appointment so you can actually describe what you want without just saying “layers.”
Tip I wish someone told me sooner: don’t let them over-layer. Three hidden pieces are plenty. More than that and fine hair just goes wispy.
4. Forward Perimeter That Kicks Off the Chin
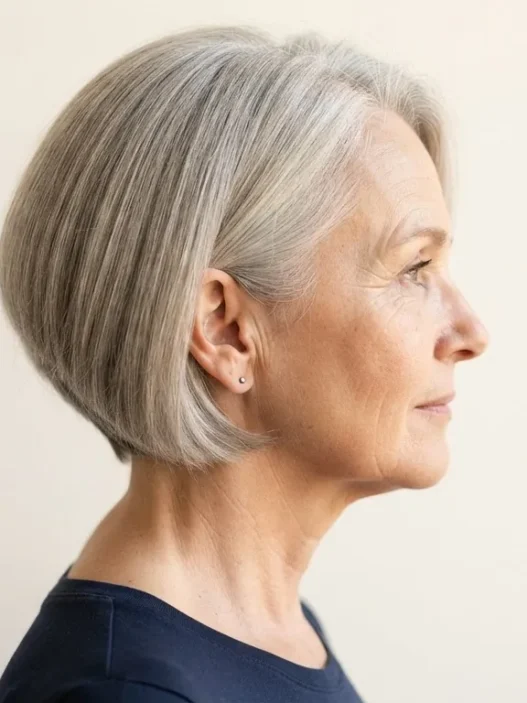
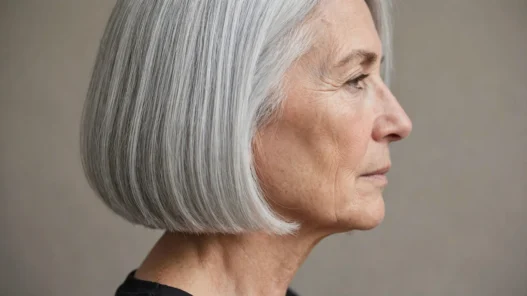
This one is subtle, but look closely at her profile. See how the front pieces angle slightly forward instead of hanging straight down?
That forward perimeter pushes hair toward the face and creates fullness around the jaw. On fine hair over 50, that front fullness matters more than crown height. It frames softening jawlines, it makes the sides look thicker in photos, and it stops the dreaded behind-the-ear tuck that makes everything disappear. I tuck anyway, I can’t help it, but at least it springs back now.
When I tried this, my stylist cut the last inch on dry hair, pulling it forward to the chin and point-cutting just the very edge. Not thinning, just a soft edge so it wasn’t a harsh line. The lift comes from the perimeter direction, and it’s honestly the easiest volume to live with. No styling needed. Air-dry and it still does its thing.
It holds for a full haircut cycle, six to seven weeks. My pick for thinning fronts, too. If your temples have gone sparse, this forward fall covers without looking comb-over-y. I found the same idea echoed in pieces about a haircut for fine hair over 50, and it’s true — direction matters as much as length.

My personal pick is #4. I wear glasses, I’m always tucking, and that forward perimeter is the only thing that still looks full at 4pm. It’s low drama and it just works.
5. Deep Side Part Carved Into the Root
Okay, this isn’t a cut at all. It’s where the volume comes from — the root — but it’s forced by where you part.
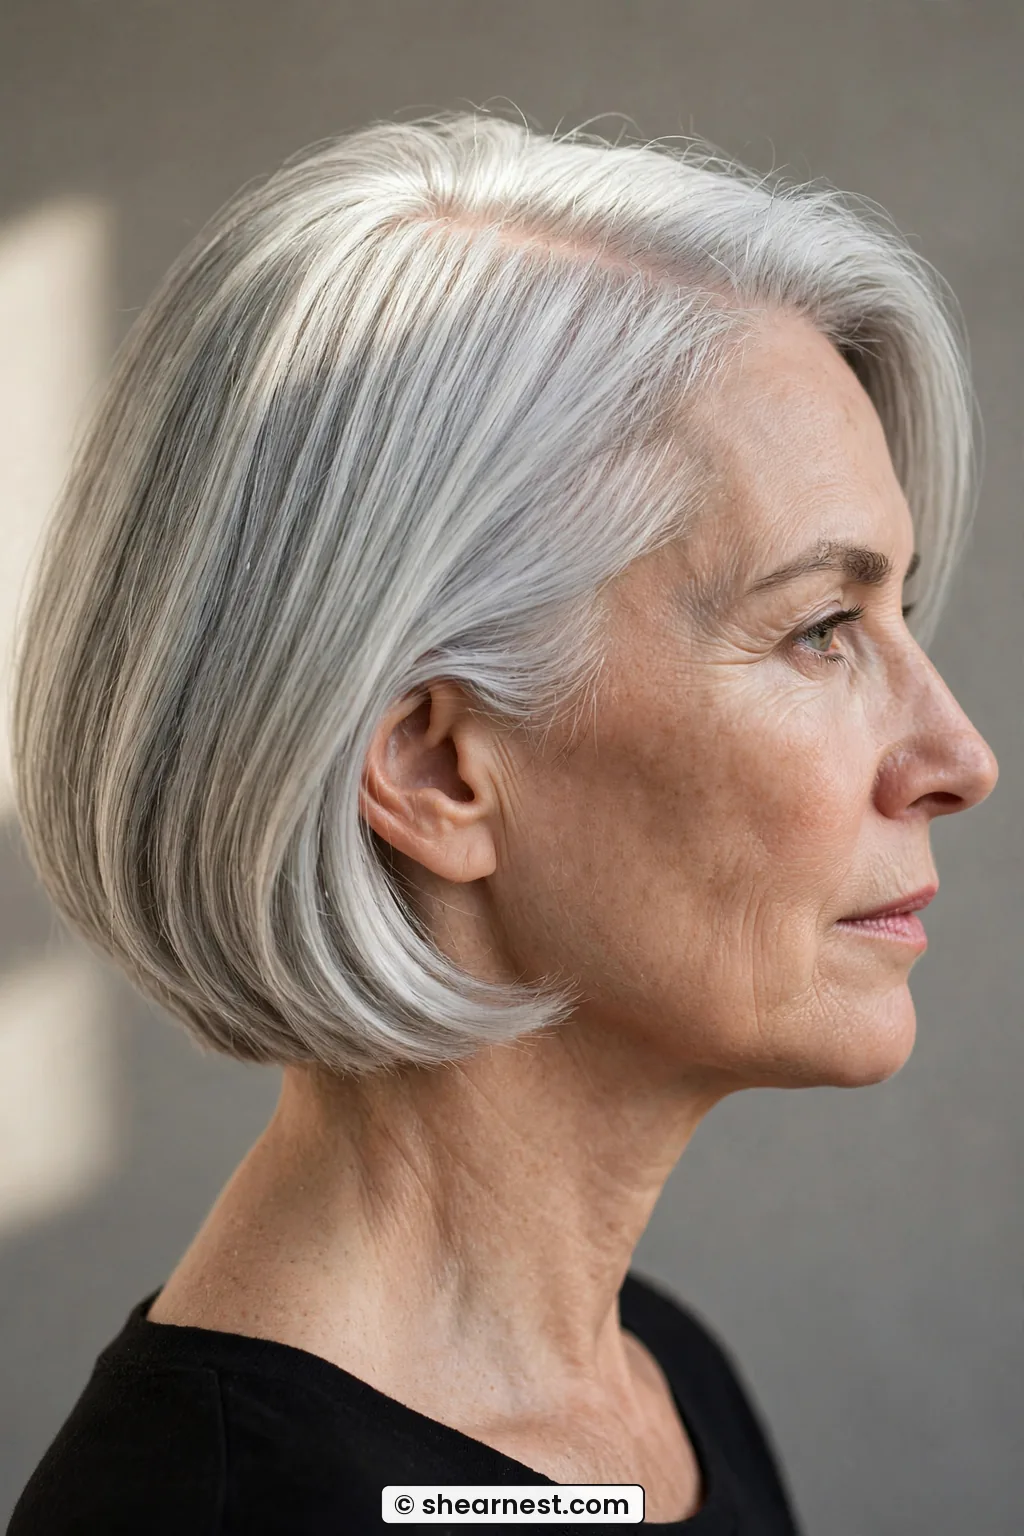
I wore a middle part for two years because everyone said it was modern. It made my fine bob lie completely flat on top. Switching to a deep side part, like two inches over from center, instantly gave me lift because hair is suddenly falling against its natural direction. Look at her crown in the photo — see that little lift right at the part? That’s not product, that’s resistance.
Here’s how I do it to make it stick: while my hair is soaking wet, I create the deep part with a tail comb, then blow-dry it flat in the opposite direction first to confuse the root, then flip it back. Sounds fussy. Takes 40 seconds. You can learn the same root-flip idea from any good tutorial on blow-drying techniques for volume and then just apply it to your part.
Honest lifespan? Until you sweat or get rained on. Then your old part wants to come back. But retraining the part over two weeks really does help. Mine now mostly stays.
6. Curtain Fringe That Drops From the Top
I love this for fine hair because a full fringe can eat up all your density. Curtain bangs don’t.
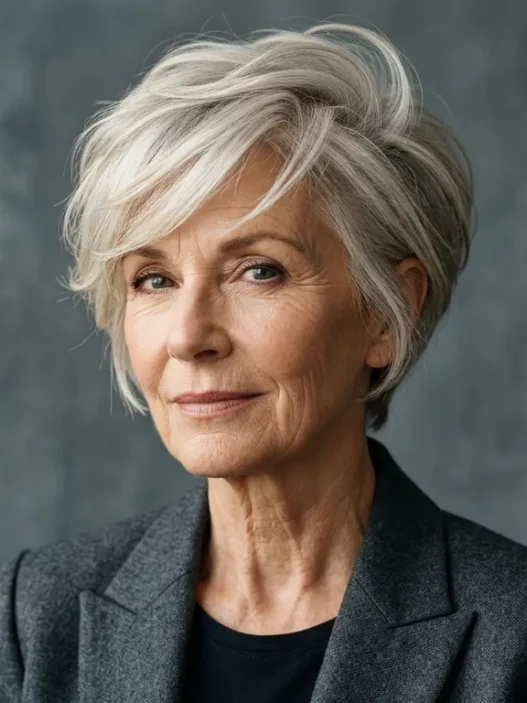
A curtain fringe is cut from higher up, near the top of the head, and splits open. That higher starting point pulls hair forward and up, which creates the illusion of more hair on top. And because it’s split, you don’t get that see-through straight-across wisp problem. She’s wearing hers just grazing the cheekbone in the picture, and that length is perfect — long enough to tuck, short enough to give lift.
The volume source here is the top section. You’re borrowing weight from the crown and moving it forward, so the front looks fuller. On me, this added so much movement that people asked if I got a perm. Nope, just bangs cut right.
Downside? Bangs get oily fast on fine hair, and then they separate. I wash just my fringe in the sink on day two. Takes three minutes and saves the whole bob. Lasts about four weeks before they grow too long to split properly, then you need a bang trim. Most salons do them free if you’re a regular — ask.
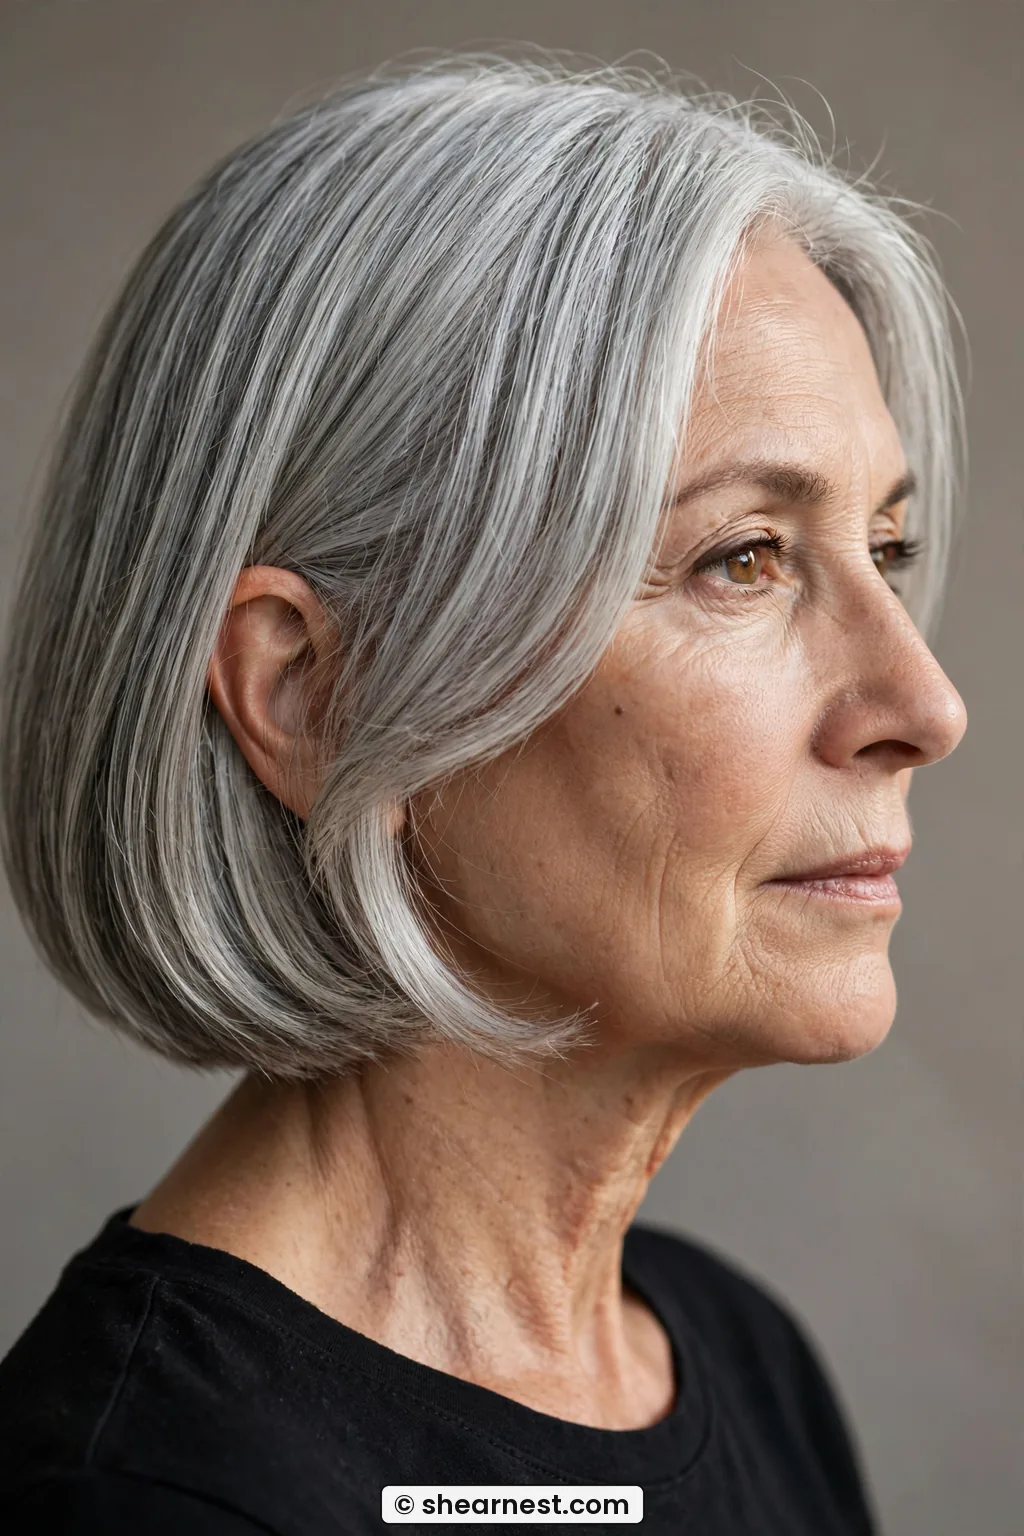
7. Hidden Undercut Pocket at the Nape
Sounds scary. It isn’t. I promise.
My stylist shaved a tiny pocket, maybe an inch tall, right at my nape underneath my bob. You cannot see it when my hair is down. What it does is remove bulk where fine hair tends to get fluffy and flippy at the neckline, so the top layer sits down smooth and looks thicker by comparison. Weird logic, but removing hair in the right spot makes the rest look like more.
The volume isn’t added — it’s revealed from removing weight at the nape. And for women over 40 dealing with those wiry neck hairs mixed with fine top hair? Game changer. My bob finally hugged my neck instead of poofing out.
It grows out surprisingly soft, about six weeks before it feels fuzzy. I just let her redo it each cut. If you have very thinning hair at the nape, skip this one — you need every strand. But if your issue is thickness at the bottom and flatness on top, ask about it. I also like browsing ideas for volume for fine hair before appointments so I have photos to show, not just words.
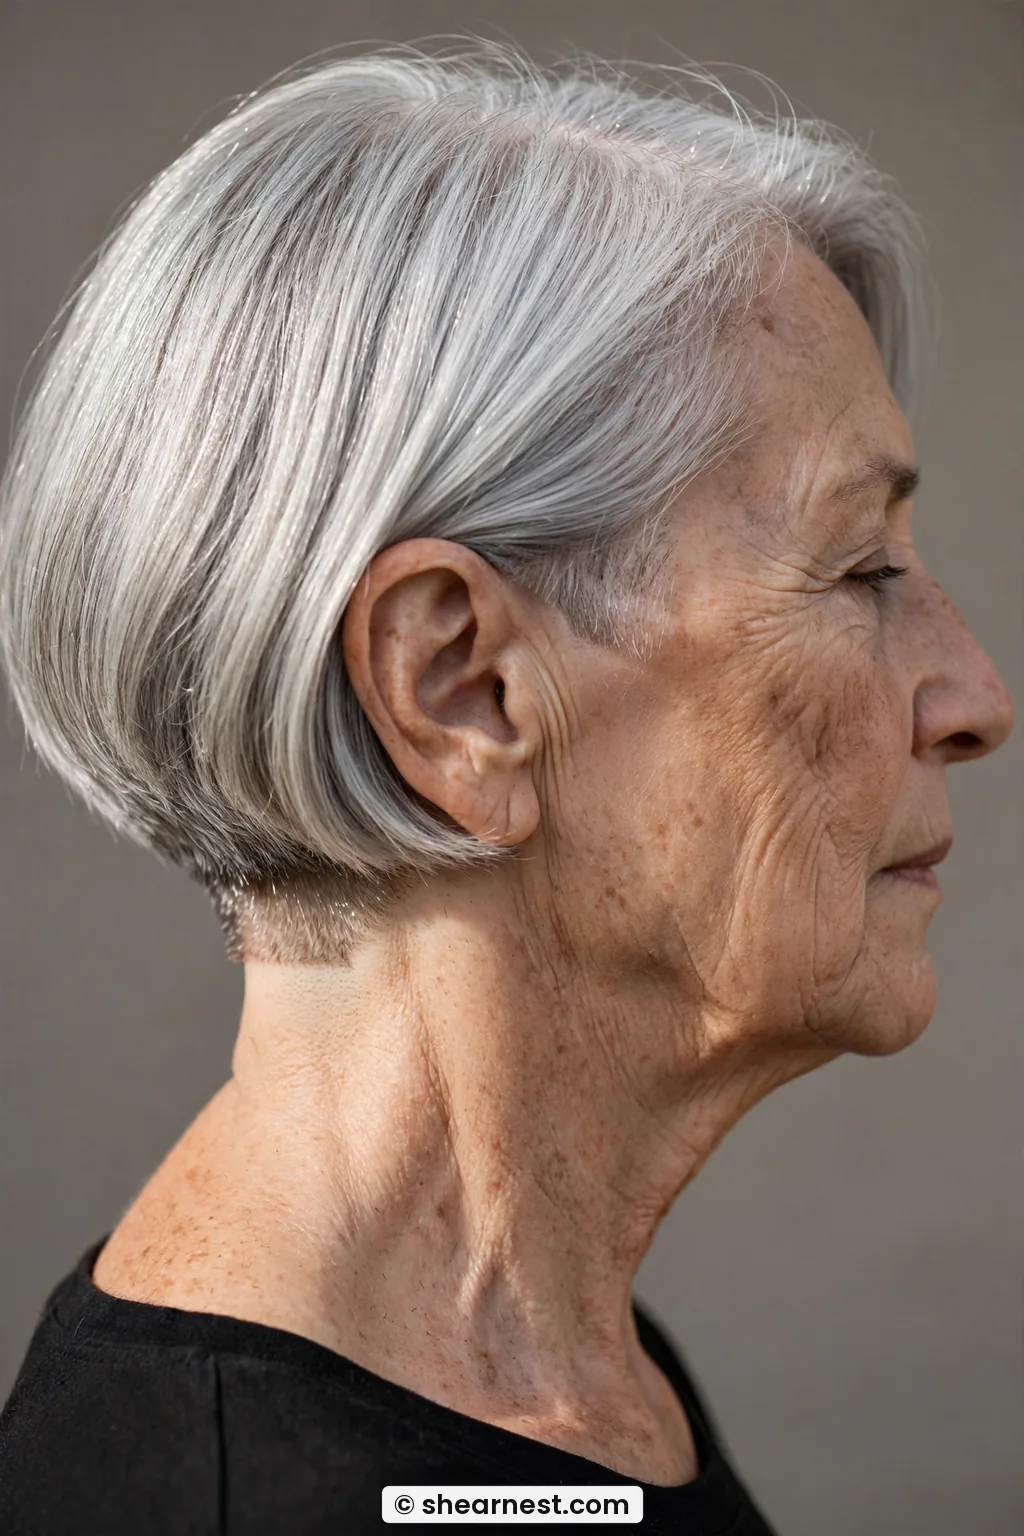
8. Blow-Dry Lift That Comes Only From Drying
Let’s be real for a minute. Sometimes the bob isn’t the problem. It’s how we dry it.
I used to blow-dry straight down because I thought that meant smooth. On fine hair, that just glues everything to your scalp. Now I flip my whole bob upside down until it’s 80% dry, then use a small round brush just on the crown and sides, pulling up and away from the head. The lift comes only from drying — no cut can do this part for you. And the difference is embarrassing. Like, why did no one grab my brush sooner?
What I use: a pea of mousse at the roots only, not the ends, and a cool shot at the end to set. Heat protectant always, because fine hair over 50 fries fast. I was skeptical about mousse until I tried a lightweight one — heavy creams just kill it. You can compare formulas in any guide to volumizing mousse for fine hair and pick the lightest hold, because crunch is not volume.
How long does it last? A few hours, maybe till dinner if it’s not humid. This is styled volume, not cut volume. It will fall. That’s normal. But on days I want photos or dinner out, this is what I rely on.
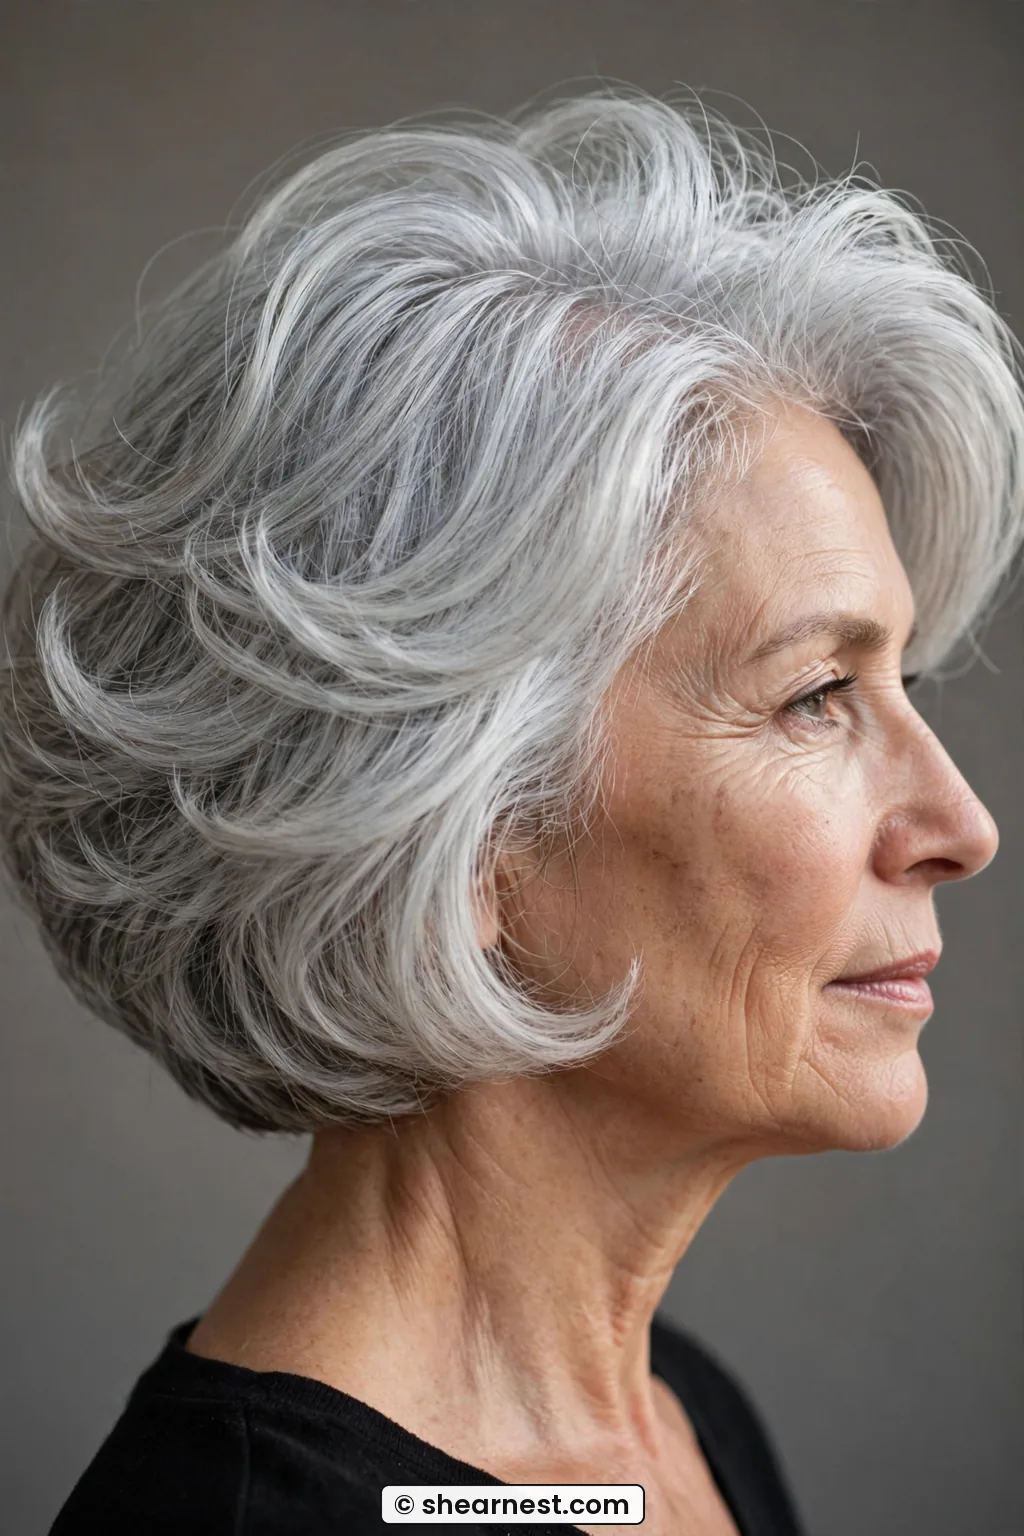
See My Blow-Dry Lift in Action
9. Blunt-Stack Hybrid Built to Last All Day
And this is the one that actually survives my whole day. The combo.
It’s a blunt perimeter in front with light stacking in back. So you get thickness where the camera sees it — around the chin and jaw — plus that push-up from the nape that keeps the back from collapsing by 3pm. Look at her side view here, you can see both things happening: sharp clean line at the jaw, soft roundness behind the ear. That balance is everything for fine hair in 2026.
I asked for this specifically last fall: keep the front blunt to the chin, stack only the back two inches, leave the crown mostly one length with those two hidden short pieces from #3. My stylist loved it because it’s low maintenance. I loved it because I could air-dry Monday and blow out Friday and both looked intentional. It also grows out gracefully, which matters when you’re stretching cuts to eight weeks.
Why does this last when everything else falls? Because the volume is built into the architecture, not sprayed on. Mousse helps, dry shampoo at the roots on day two helps, but even naked with no product this shape holds. If you’re only going to try one thing from this list, make it this hybrid. And if you want more context on density versus thickness, I keep sending friends to posts about fine and thinning hair — knowing which one you have changes which bob you should pick.

So tell me — are you team blunt and sharp, or team stacked and round? I flip-flop every appointment, but right now that hybrid is winning for me. Take a screenshot of the one you love and show your stylist the side view, not just the front. That’s where the volume story really shows.